
Registering an OAuth App with Google and Twitter
OAuthGiving your users the ability to login on a website via a trusted OAuth provider is a huge benefit. As far as user experience goes, often one of the last things people want to do, when trying to gain access to a website, is register yet another email & password combo. Thus being forced to remember another pair of website-specific login credentials.
Adding OAuth login support to your user driven website can comfort users in a myriad of ways. Below are a few that come to mind:
-
For one,
securityis implied, as they will be doing the logging in through their trusted account provider with whom they’ve already registered with. -
Giving users
controlover what personal information the login provider shares with the target site lets the user feel safe about registering with the site. -
And, of course, the obvious gain of
flexibilityis a huge win, giving the user the ability to seamlessly come and go as they please between sites. All while providing one place for them to see exactly which sites have access to what information. Google, Twitter.
Creating OAuth driven sites is often a lot easier than people think. However, I’ll be covering that in a later tutorial. Right now we’re going to learn how to do something even simpler, register OAuth apps with Google and Twitter. This is important because it defines exactly what the access limitations of our website or service will be when we ask the user to grant us access to their information. Registering an application with a provider gives us a set of unique credentials. The OAuth provider uses these to identify our site as the application we will be creating in this tutorial. Let’s get started.
Registering an application with Google
In order to register our OAuth application with Google, we need to head over to the Google Developers Console. Upon arriving, you should see a screen like this:
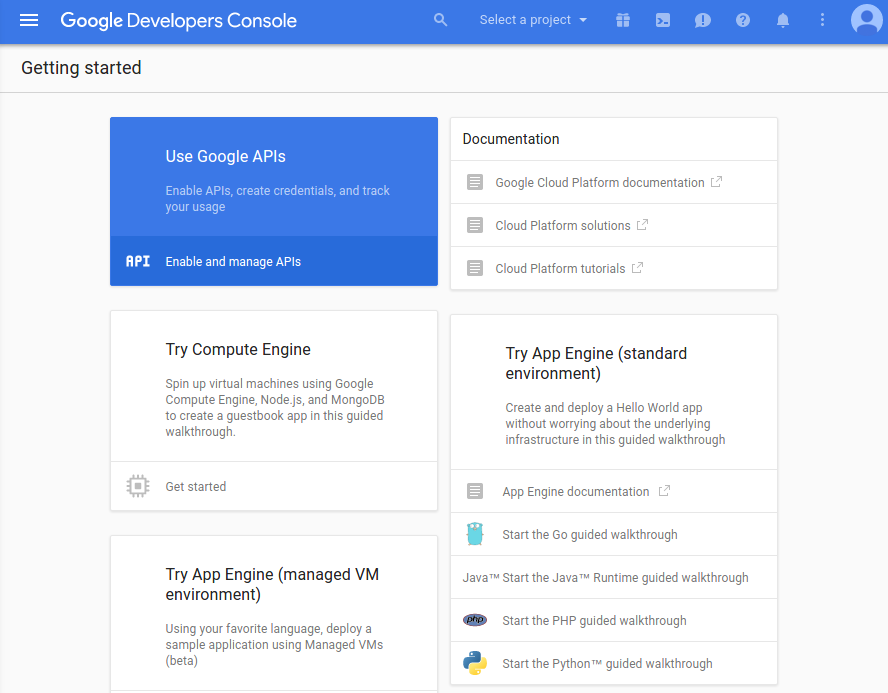
We then want to click the “Select a project” drop down, and from there select “Create a project…”.

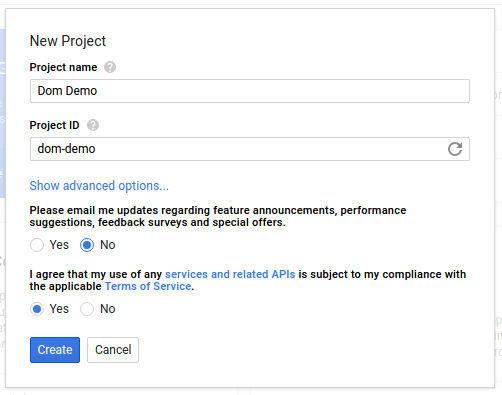
Fill out the form with a project name and a unique project ID, then click create.
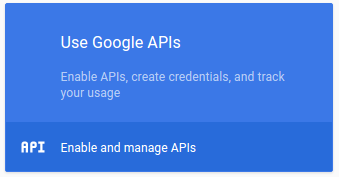
After the project has been created, you should be routed to the dashboard for your project. From here, we can click on the “Use Google APIs” box to finish configuring our application.
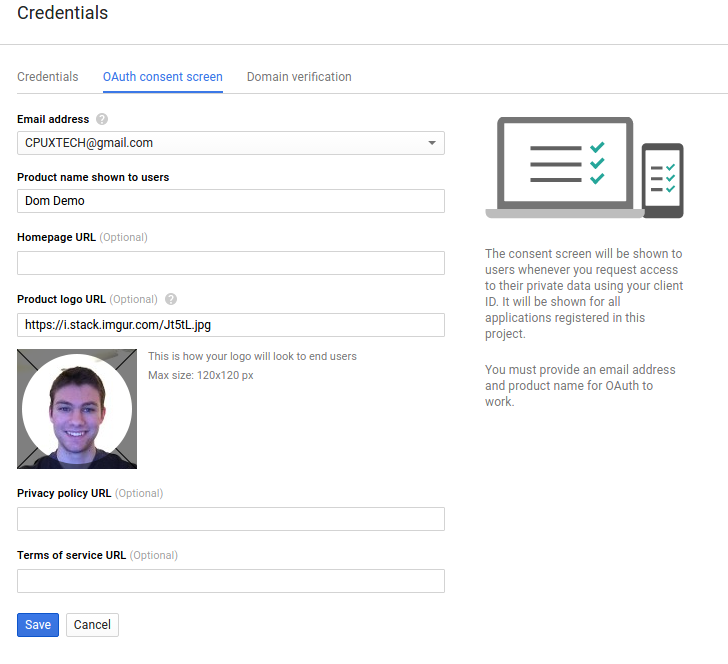
The API Manager consists of two main sections. In “Overview”, we can add Google product APIs to our project for more extensive access. In the “Credentials” section, we can configure different parts of our application’s identity. Click the Credentials entry on the left sidebar. Before we can create the necessary credentials for our application, we need to customize our OAuth consent screen. Click the “OAuth consent screen” tab next to the default “Credentials” tab. Now, we can fill out the information that Google will display to the user when our application asks for access. After filling out the consent screen information, your form should look something like this:
After clicking Save, you will be prompted to create credentials. Now that we have customized our OAuth consent screen, we can create an OAuth client ID with Google by clicking the “OAuth client ID” entry under the “Create credentials” dropdown.

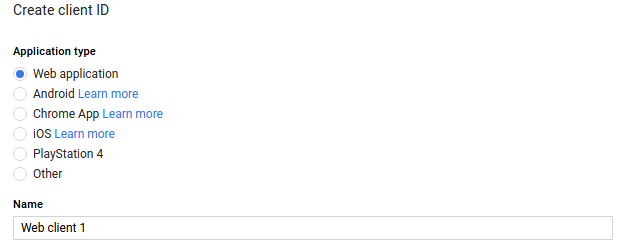
We will then be prompted to select the type of our application. We will be selecting “Web application”. For the name of our credentials, we can put whatever we want. This does not have to be the same name as our application or project. For example, we can make different credentials to specify different origins and callbacks. However, for more simple applications it will suffice to have one.
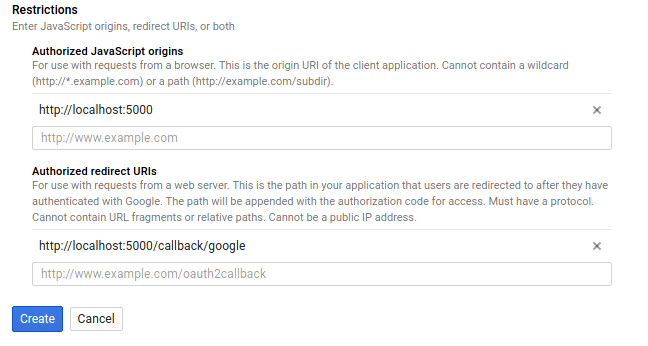
The next section displayed is the Restriction section. The “Authorized JavaScript origins” lets Google know that a request for user data access on behalf of your site or application will come from a predetermined origin. This prevents someone from spoofing an access request from a bogus location on behalf of your application. “Authorized redirect URIs” ensures that when a user accepts or denies our application access, they will be redirected to the right URI with a temporary code that our application can use to exchange for an access token.
If someone were to try and change the request on its way to Google, they could define their own redirect URI. This could lead the user back to a possibly malicious site, with the necessary data to access their information (A code to exchange for an access token). Google checks the redirect URI in a given request against those that we input here to ensure the user is being redirected to one of possibly several correct callback destinations. For a demo site, your form might look like the following:
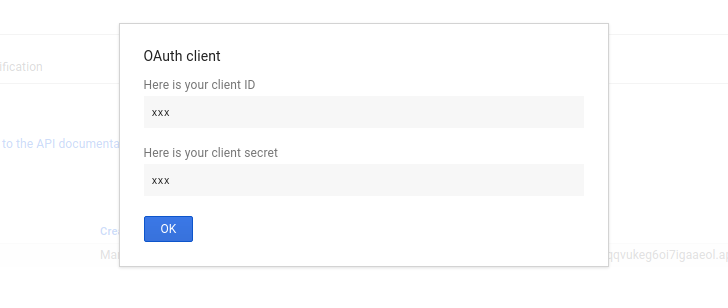
Once we hit “Create”, we will be prompted with our credentials. It is important to save these, keep them safe, and never commit them to any public repository. Doing so could let anyone build an imposter web application pretending to be your own, asking users for their information on your behalf.
That’s it! Make sure you put the credentials you received into some configuration file that your
application can use. Always make sure that configuration file is in your .gitignore file to keep
it from public eyes.
Registering an application with Twitter
Registering an OAuth application with Twitter follows a very similar process. First, navigate to the Twitter Application Management page. From here, select the “Create New App” button.

You’ll see that the process for creating a Twitter OAuth application is very cut and dry. You’ll need the following:
- Application Name
- Description
- Website
- Callback URL
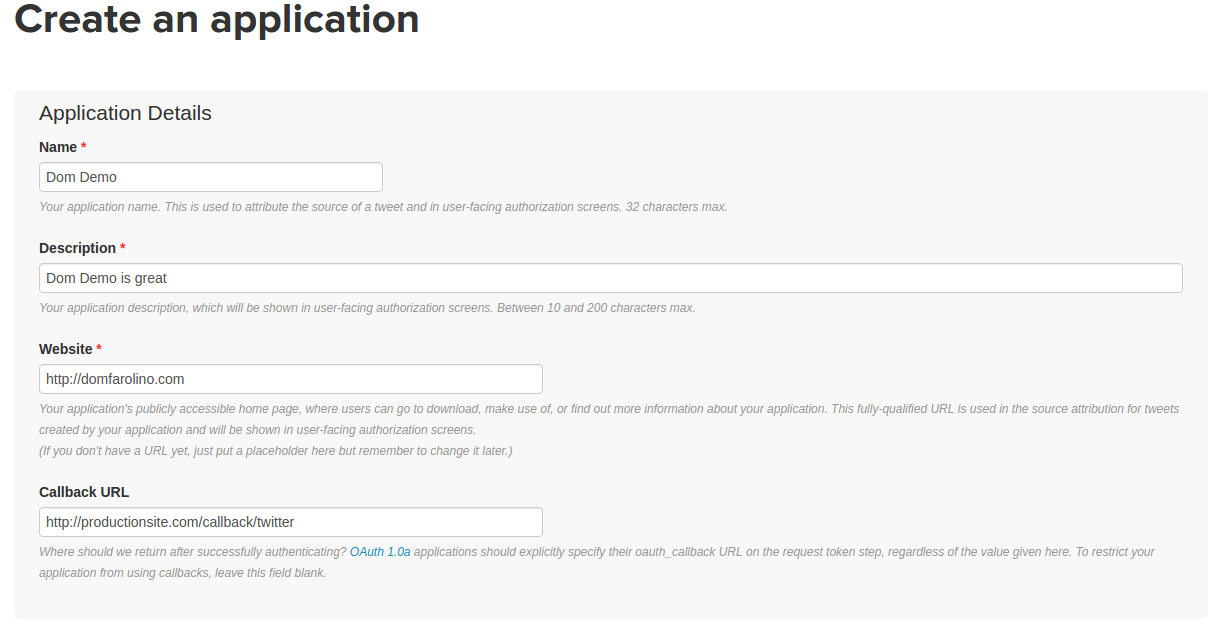
Notice that I did not associate a callback originating from localhost in this form. This is due
to the fact that Twitter will not allow you to supply a localhost address for your application
callback. However, fret not! The following quote, from
this page,
shows that it is still possible to have your Twitter app redirect to a localhost address, or
any address other than the specified callback URL for that matter:
In OAuth 1.0a, you are required to send an oauth_callback parameter to the oauth/request_token every time, regardless of what you put in this field. At the oauth/request_token step, you can provide a http://localhost/blah/blah/blah151 callback if you like. You just can’t associate localhost with your application record on dev.twitter.com.
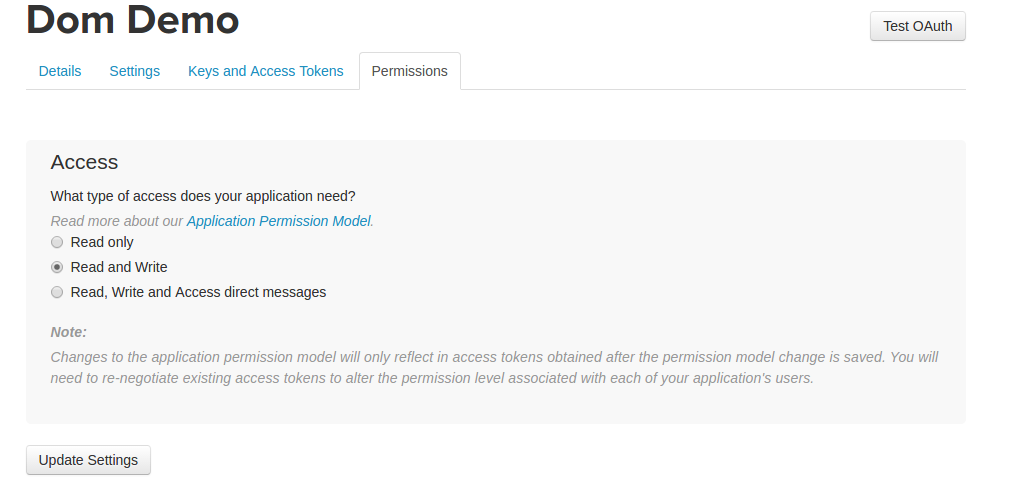
Once your application is created, you can roam through the settings and permissions section of your app to modify its information, security, and access.
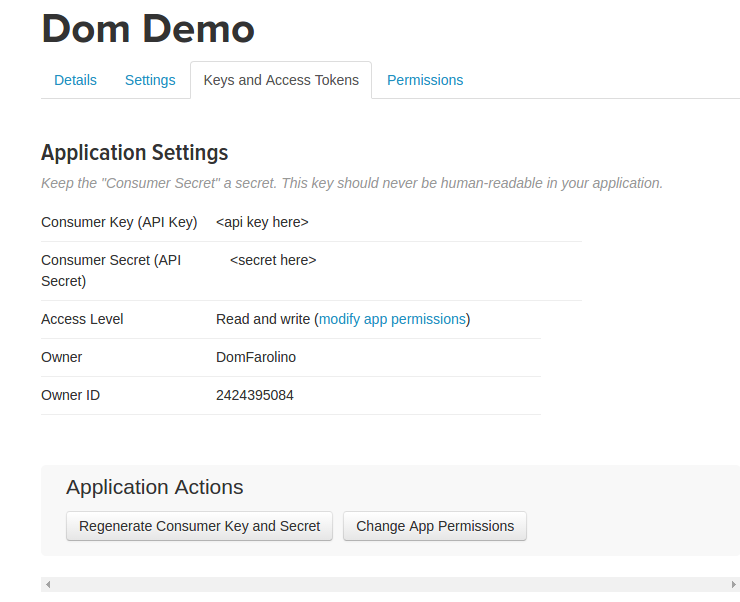
Your consumer key and consumer secret can be found under the “Keys and Access Tokens” tab. These values are what your app will use to identify itself with Twitter on API requests. As with the credentials we got from Google upon app registration, make sure these are kept secret and never committed to any public repository.
Note that in a production application, it is wise to enable callback locking. This makes it impossible for a request to be tampered with to allow Twitter to redirect to a URL other than the one specified in the application settings. The callback locking feature can be found under the Settings tab.
